Photography on day trips and hikes
Photography is a fun hobby, and it fits naturally with day hikes and longer treks. For many people, taking photos is actually the main reason to head outdoors. You can get good shots on your phone, but this article focuses mainly on using a system camera.
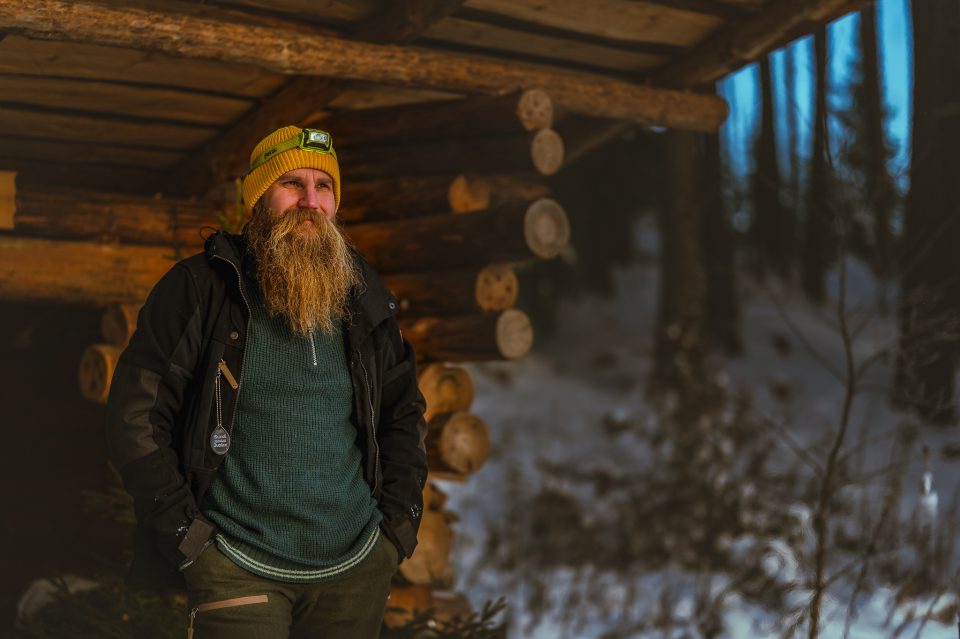
I'm Caj, content creator at Scandinavian Outdoor. Most of the photos you see in our marketing are mine, and the models are often people who work here. By my own reckoning, I've been “into” photography for 10 years, and I still notice myself improving all the time. There's so much to learn that no single guide could cover it all. In this post, though, I'll share my own tips for photography on day trips and treks.
Phone vs system camera
Shooting on a phone is usually the easiest option, and phone cameras keep getting better. But when you want to capture distant subjects, a starry sky, the northern lights or other tricky scenes on a trip, it's time to swap the phone for a system camera.
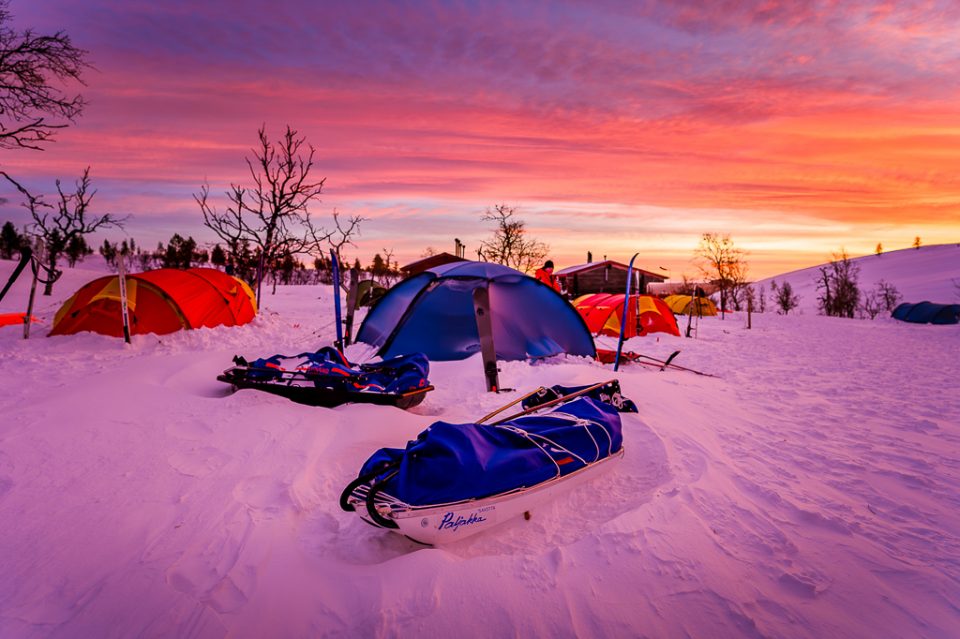
The sky blazing with morning colour. On a ski trip along the Hetta–Pallas route.
20 mm F3.5 1/100s ISO 100.
A system camera gives you far more control over the image. A phone relies heavily on automation and usually decides for you how the photo turns out. With a system camera, it's easy to adjust exposure and depth of field, and swapping lenses lets you change the focal length too. Holding a bigger chunk of kit in your hands also just feels more like proper photography.
How to get started with photography
In my view, the easiest way in is to take a photography course or work through plenty of tutorials online. You'll often find conflicting advice, but that's simply because there are so many ways to get the job done.
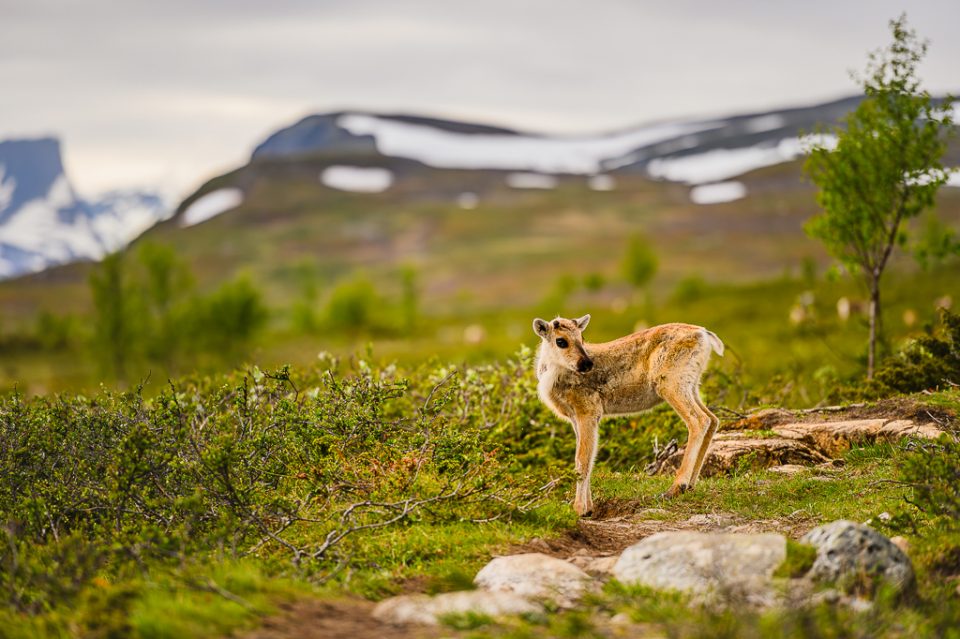
A reindeer with snowy fells in the background. I'd been waiting for this moment and got down almost to ground level so the fells sat nicely in the background. I'd set a higher ISO just in case of sudden movement. 200 mm F2.8 1/3200s ISO 400.
Practise with your camera straight away until you can find every button without looking. This helps especially when shooting at night. Most cameras let you customise the buttons, and I'd recommend at least trying back-button focus.
I started learning the basics by shooting in manual mode, practising one element at a time. Once you've got the fundamentals down, it's much easier to get the shots you actually want rather than whatever happens to come out. You'll get fewer failed shots, and editing becomes easier too.
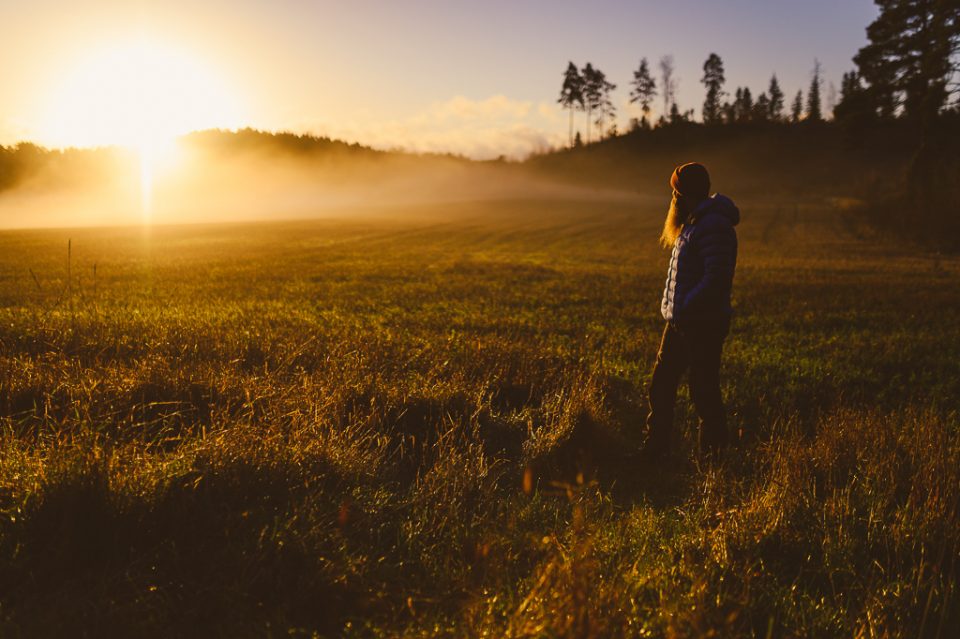
A self-portrait taken with a tripod. The aperture was “wide open” to bring out the mist over the field and soften the background. In composition, you usually leave more space in the direction the subject is looking or moving. 35 mm F1.4 1/8000s ISO 100.
The name “system camera” comes from the fact that it's a system made up of a camera body and lenses. As well as a body that suits you, you'll usually need a few lenses. You can spend endless money on this hobby, but buying smart and going for used lenses keeps costs under control. A used lens can often be sold on for close to what you paid, so your money is more or less just on deposit. Think early on about building a lens set that works for you as a whole, rather than just buying whatever looks appealing.
How to choose the right system camera
Once you start looking at cameras, you'll quickly hit the limits of your budget – new bodies are seriously expensive. For your first camera, ask friends who shoot for advice, but bear in mind that hobbyists tend to stick with one brand and may not know much about the alternatives. You can also find used cameras at sensible prices.
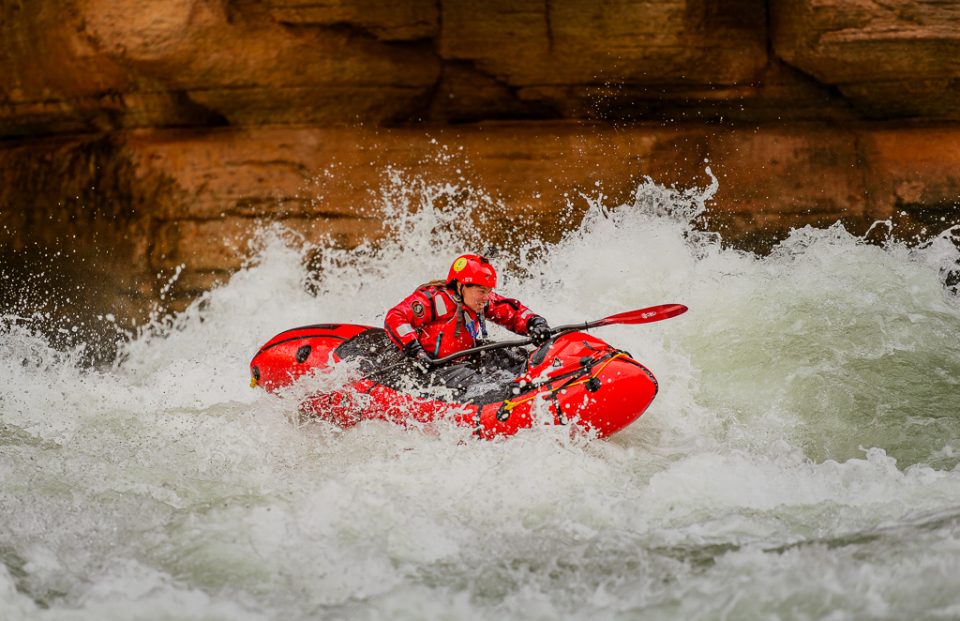
An action shot from whitewater rafting in the Grand Canyon. Freezing the spray from the waves takes a fast shutter speed. 200 mm F2.8 1/640s ISO 100.
You can choose between full-frame and crop-sensor cameras. Crop-sensor bodies are often the more affordable beginner cameras. Besides the price, they have another advantage: the crop factor gives you extra reach, so shooting distant subjects often works out cheaper. Full-frame cameras are generally higher-end, professional bodies with a wider choice of higher-quality (and pricier) lenses.
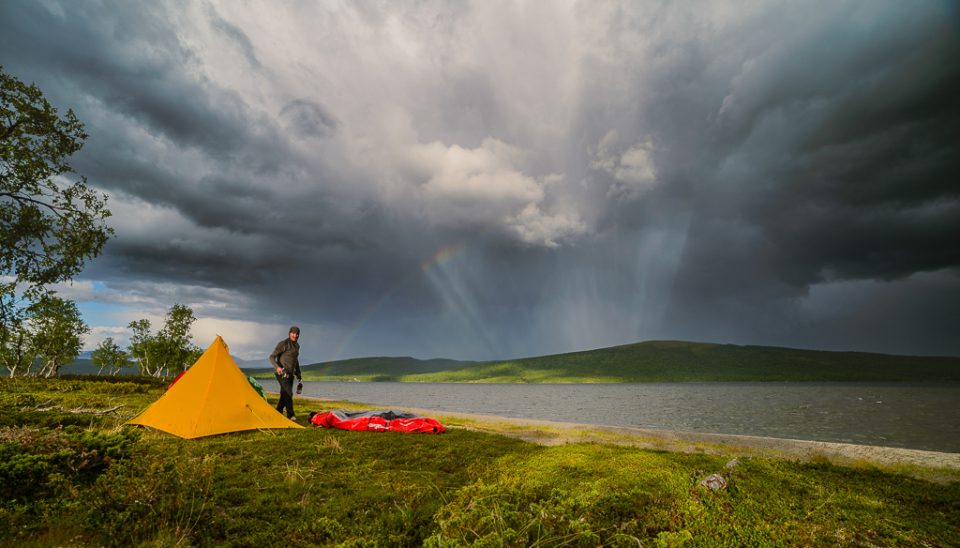
Incredible clouds and a rainbow beyond the lake. It only lasted a few seconds. I stopped down so that ISO 100 was enough, while keeping the shutter speed fast enough to freeze slight movement. 14 mm F8 1/250s ISO 100.
When you buy a camera, you're married to it for a good while. If you build up a few lenses and later think about upgrading, it's easier to stay with the same brand so your lenses still fit. There's plenty of choice these days, and it's impossible to name the best. Manufacturers tend to make leaps at different times – one seems ahead for a while, then the tables turn.
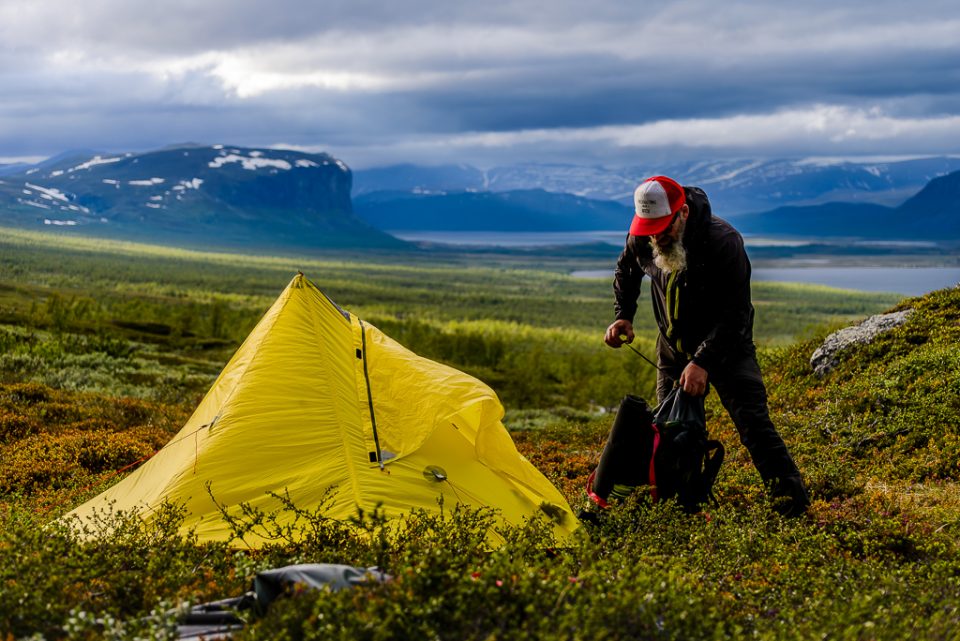
Pitching the tent in the Swedish mountains. A slightly longer focal length makes the mountains behind look more imposing. The ISO could have been lower, but the light was patchy and I preferred to play it safe. 70 mm F4.5 1/3200s ISO 800.
For day trips and treks, I recommend a lightweight system camera with lightweight lenses available for it. If you spend a lot of time outdoors, weather sealing on both the body and lenses is worth having. A few years ago I switched from DSLRs to mirrorless, and the size and weight of my kit dropped considerably.
On treks I usually carry just a 24–200 mm superzoom, which covers almost everything I need. When I know there's a good chance of great night shots, I add a 20 mm prime.
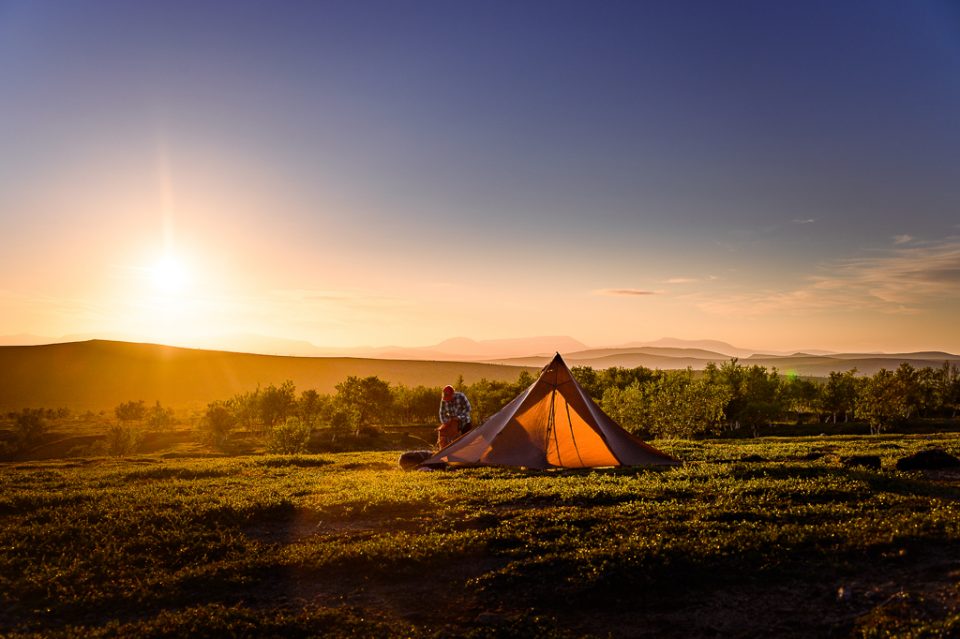
Midnight sun, setting up camp against the light. 46 mm F5.3 1/3200s ISO 100.
I started out with an inexpensive but well-built crop-sensor DSLR, the Nikon D3100. It produced really dynamic images and, if I remember rightly, cost about €350 new. It was great value for money. Later I started shooting weddings and other jobs semi-professionally, and moved up to the full-frame Nikon D610, which I was very happy with. When mirrorless cameras came along, I saw a chance to lighten my kit for trekking and eventually switched to the Nikon Z6. As you can tell, I've been married to Nikon from the start.
What lenses do I need for outdoor photography?
To choose the right set of lenses, you need to know what you want to shoot. Lenses come as primes (fixed focal length) or zooms. If you don't yet know what you'll be shooting and you're just starting out, I'd recommend a zoom. The kit lenses that usually come with cameras are a really good way to get going.
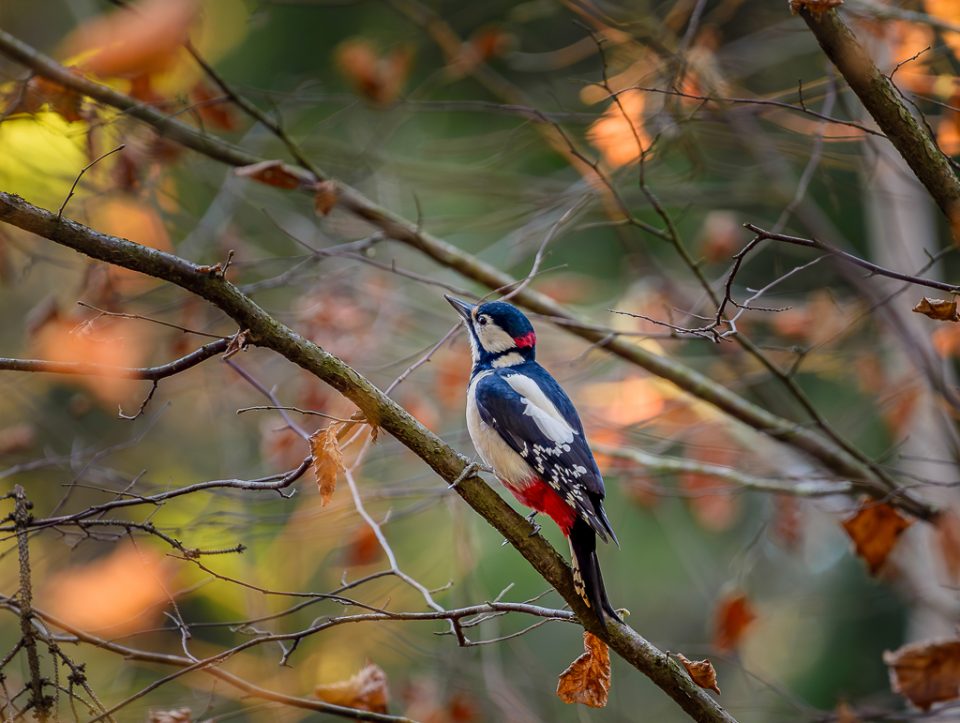
Bird photography usually needs at least 200 mm. When the subject is further away, a full-frame camera may need a lot more. You usually need a fast shutter speed too, although a great spotted woodpecker is often an easy subject. 500 mm F5.6 1/80s ISO 800.
Once you start noticing what you need, think about the bigger picture and add lenses as your budget allows. These are the things I consider most:
Lens features
- focal length
- aperture
- weight
- weather sealing
- price
Focal length is given in millimetres. Multiplied by the camera's “crop factor”, it gives you the 35 mm equivalent. The more millimetres, the more it magnifies. For example, a 100 mm lens on a “full-frame” camera has a 35 mm equivalent of 100 mm, but on a camera with a 1.3 “crop factor” the equivalent is 130 mm.
The higher the 35 mm equivalent, the greater the magnification.
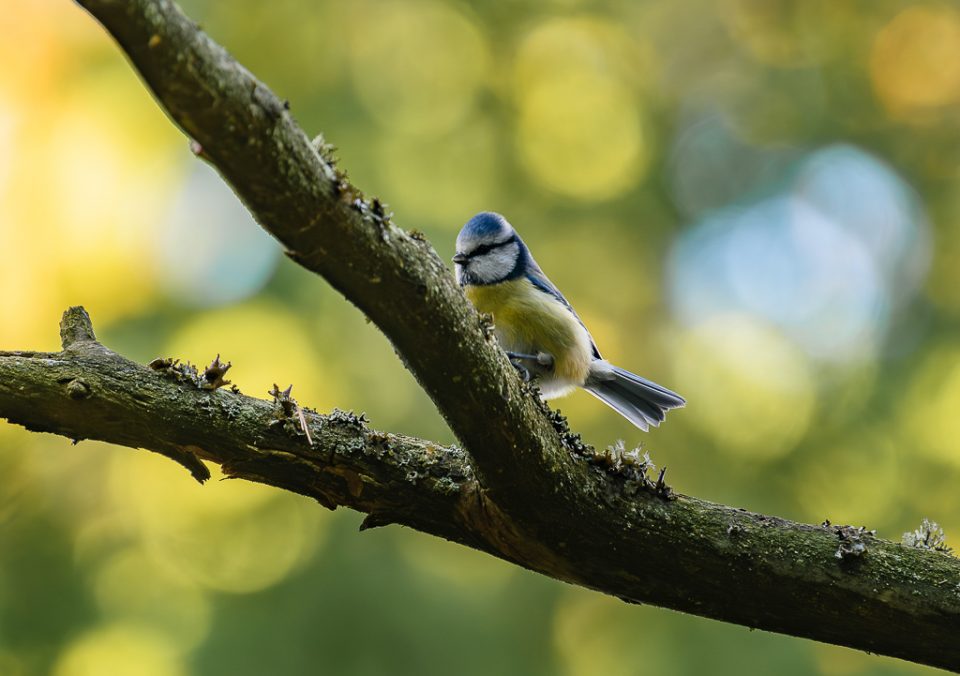
The blue tit is a nimble little thing, but now and then it sits still for a second. 500 mm F5.6 1/100s ISO 800.
I use a full-frame camera, and these are the focal lengths I find myself using most:
- I use a wide-angle lens in the 14–20 mm range for starry skies, the Milky Way, the northern lights– and landscapes. It also works for more unusual close-ups.
- A 35 mm prime used to be my most-used lens, and you can get these affordably with a fast aperture (even F1.8). It's a really versatile focal length for people, details and landscapes on day trips and treks.
- An 85 mm lens is great for portraits. A fast lens gives a soft background, and facial features don't get distorted the way they do with a wider lens. It also makes fells and other features in the background look big, whereas a wide angle shrinks them.
- 100–200 mm starts to be long enough to shoot birds and distant subjects to some extent. When you're up high, such as on top of a fell, it also gives you nice landscape shots. It works for close-ups too when you want a soft background.
- 200–600 mm: when you're shooting more birds or wildlife and can't get close enough, you need more millimetres. These telephoto lenses are really expensive, and fast ones in particular cost thousands of euros.
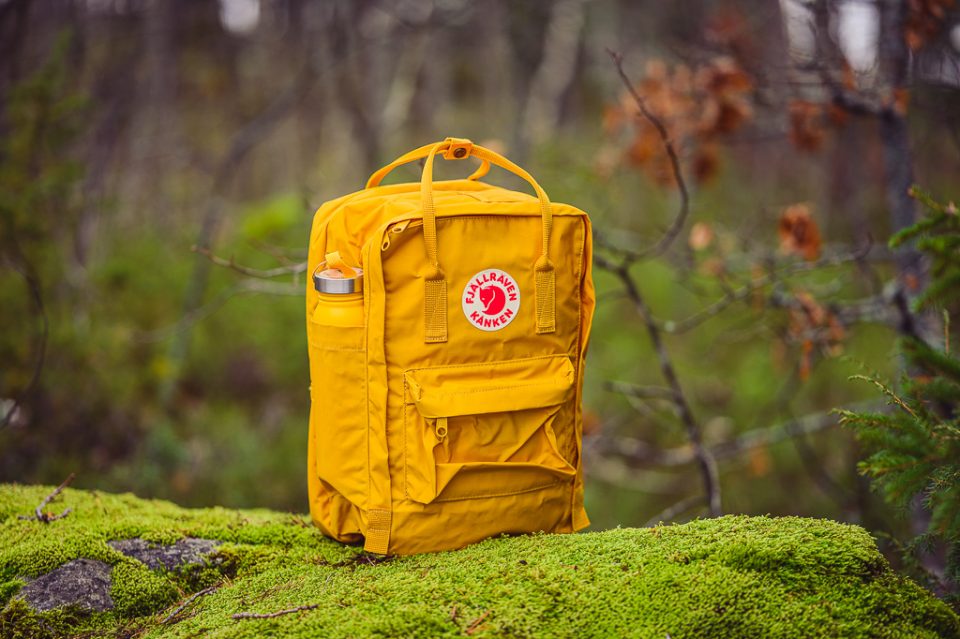
A soft background for a backpack in a product shot. 85 mm F1.8 1/160s ISO 100.
Lenses list an aperture – more precisely, the lens's maximum aperture. The number works in reverse: the smaller the number, the larger the aperture. It's a bit confusing, but the key idea is this: the smaller the number, the shallower the depth of field, the darker the conditions you can shoot in, and the faster the shutter speed you can use. That's where terms like “fast glass” or a fast lens come from. Primes with a large aperture (small number) are available at reasonable prices, but with zooms the price often jumps.
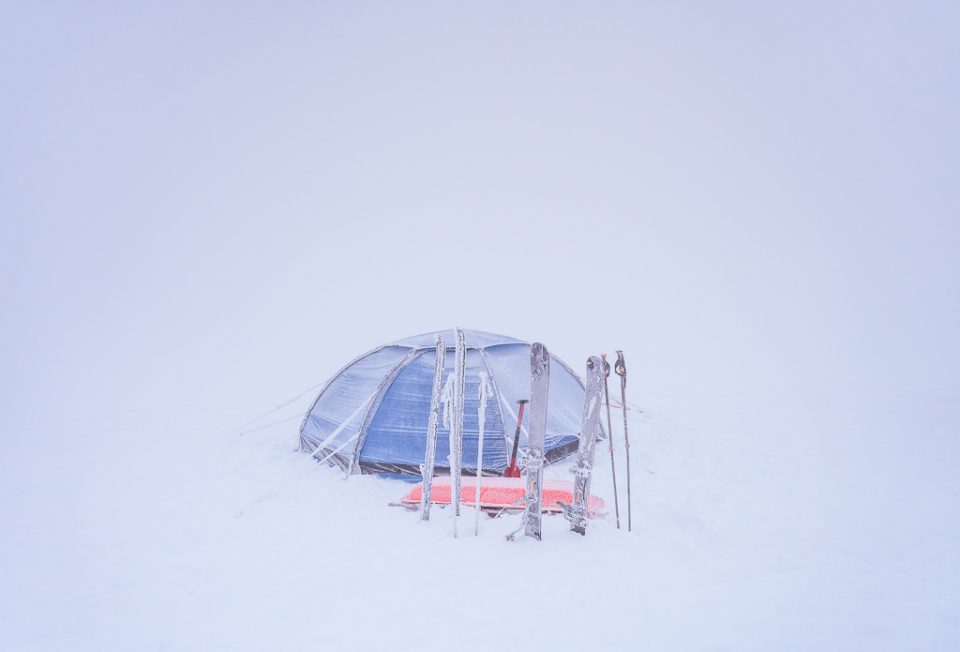
A tent in a whiteout. I'd forgotten to change the ISO 800 from the previous evening's shoot – less would have been plenty. 26 mm F4.2 1/6400s ISO 800.
Weather sealing matters, especially on treks. Cameras easily pick up moisture and dirt, and moisture and dust can also get in where the lens meets the body. More expensive lenses are almost always weather-sealed.
Lenses are very expensive, especially new, and price limits what you can buy in the first place. That's why it pays to plan carefully what you'll shoot and what you need, then put the set together as cheaply as possible. If you own lenses that overlap, you're also spending money “for nothing”.
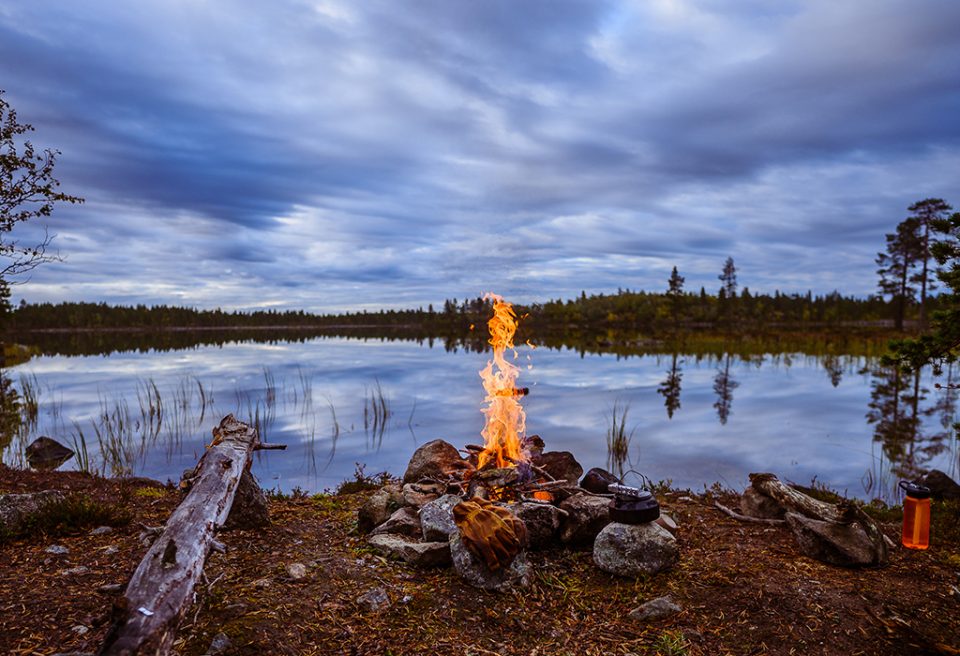
A flame is a moving subject – it actually needs a very fast shutter speed if you want to freeze it. 20 mm F1.8 1/1000s ISO 100.
My current lenses: Nikkor Z primes: 20 mm f/1.8 and Nikkor 85 mm f/1.8. Zooms: 24–70 mm f/4 and 24–200 mm f/4–6.3. The focal ranges overlap, but one is better for video and the other for all-round photography. I'm saving up for a 180–600 mm f/5.6–6.3 next.
What is there to photograph on a trip?
Once you've got your camera and head eagerly into the woods for your first photo outing, you'll quickly realise there are subjects everywhere. Nature always offers plenty to shoot, all year round, and you'll spot details you'd probably never notice without a camera.
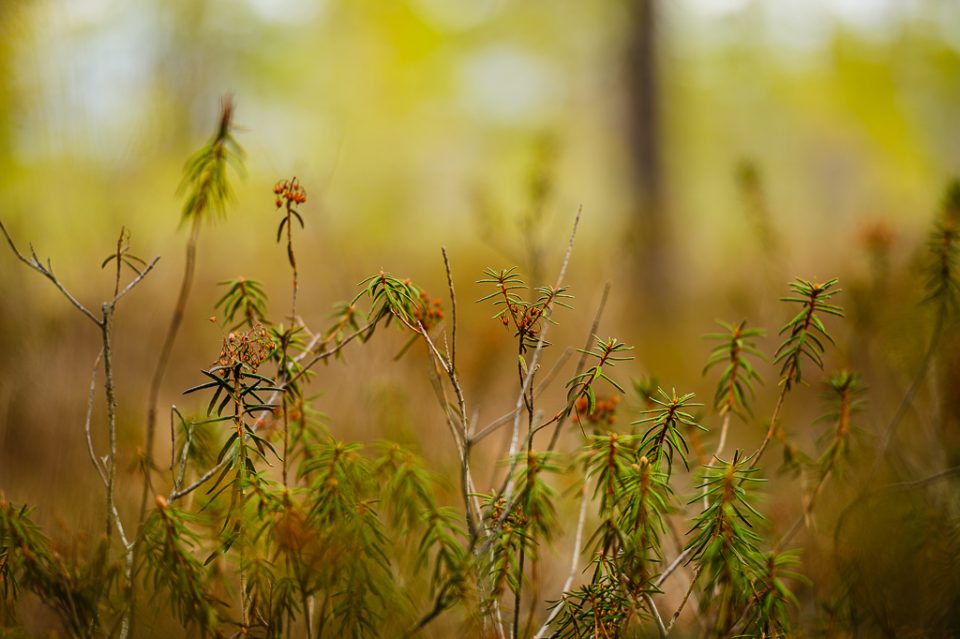
Marsh Labrador tea at the edge of a sunny bog. The soft background makes the flowers stand out. 200 mm F2.8 1/250s ISO 100.
A few ideas for what to shoot on a trip:
- Macro photography is fascinating. You can shoot all the small details of nature, as well as insects – you'll never run out of models. There are dedicated macro lenses, and some telephoto lenses can do the job too.
- Close-ups at a larger scale than macro. Nature has plenty of subjects, and kuksa cups, knives and the like are easy models too.
- Portraits add a new dimension and interesting content to your photos. They also make for the best memories. You can pose people for polished social media shots or take a more documentary approach.
- Landscape shots let you capture memories of the places you've been. You can shoot these documentary-style, as natural as possible, or get creative in editing – making the image beautiful or focusing on capturing feelings rather than “reality”.
- Bird and wildlife photography is often a bit more challenging, since the models rarely follow instructions, and you need to get to know the animals you're photographing.
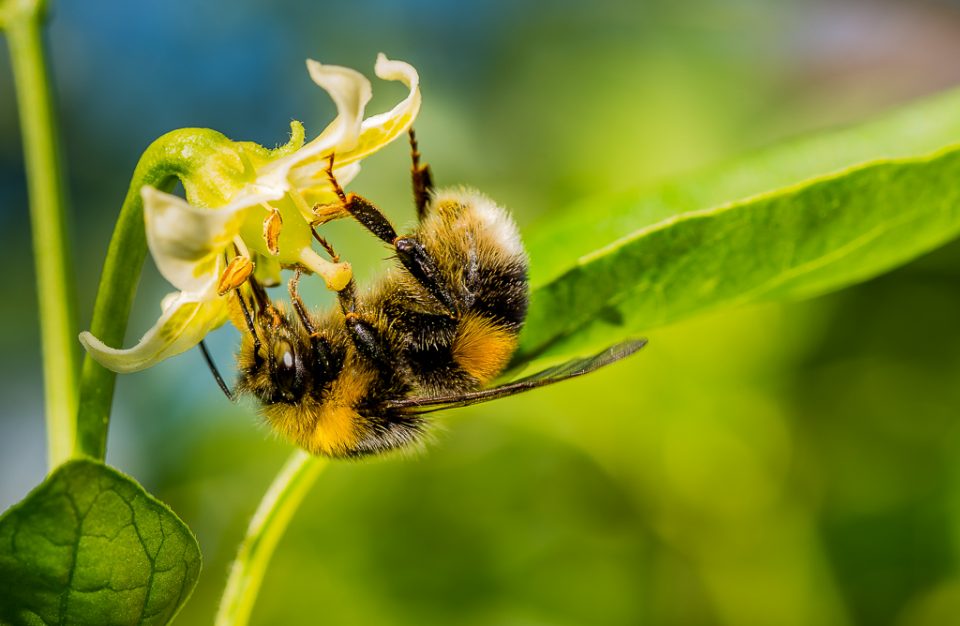
A bee collecting pollen, shot with a macro lens. The challenge with macro is the limited depth of field, but here both the flower and the model are sharp. 90 mm F16 1/100s ISO 100.
How to get a good photo
This is my favourite question, and something worth coming back to now and then. What makes a good photo? There's no right answer, because it depends on who's looking.
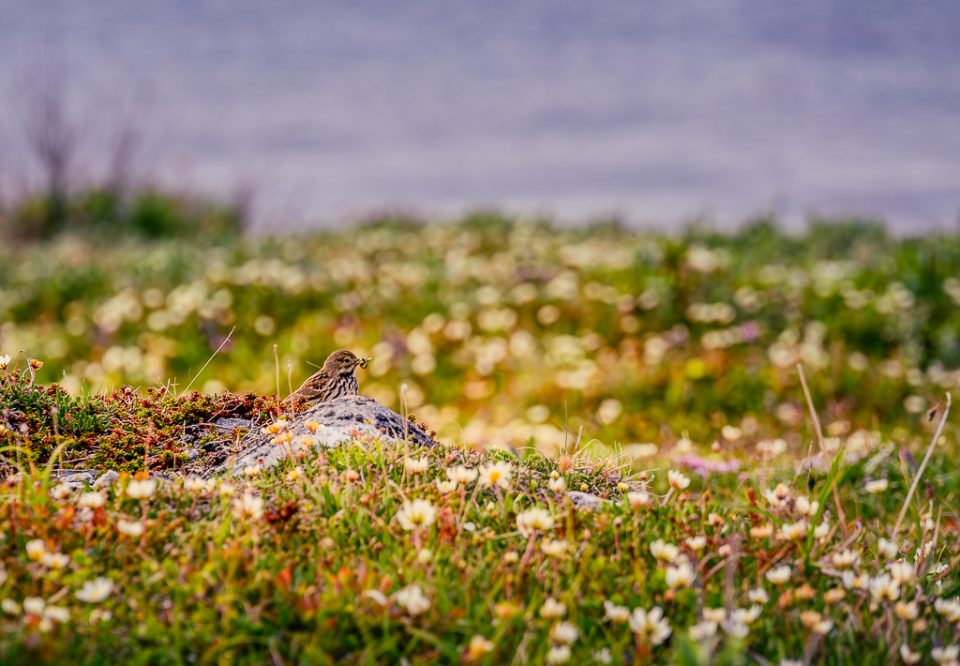
I don't know my birds well enough – a red-throated pipit, perhaps? It was hunting insects in a flower meadow. I shot from right down at ground level to get the Arctic Ocean in the background and give the bird a nicer backdrop. 200 mm F6.3 1/250s ISO 400.
When I started out, I learned by looking at other people's photos. I'd scroll through 100–1,000 images a day on photo-sharing sites, stopping whenever I found one I thought was good and asking myself what made it work. After a year of that, I began to understand what kind of photos I liked and what I wanted to shoot.
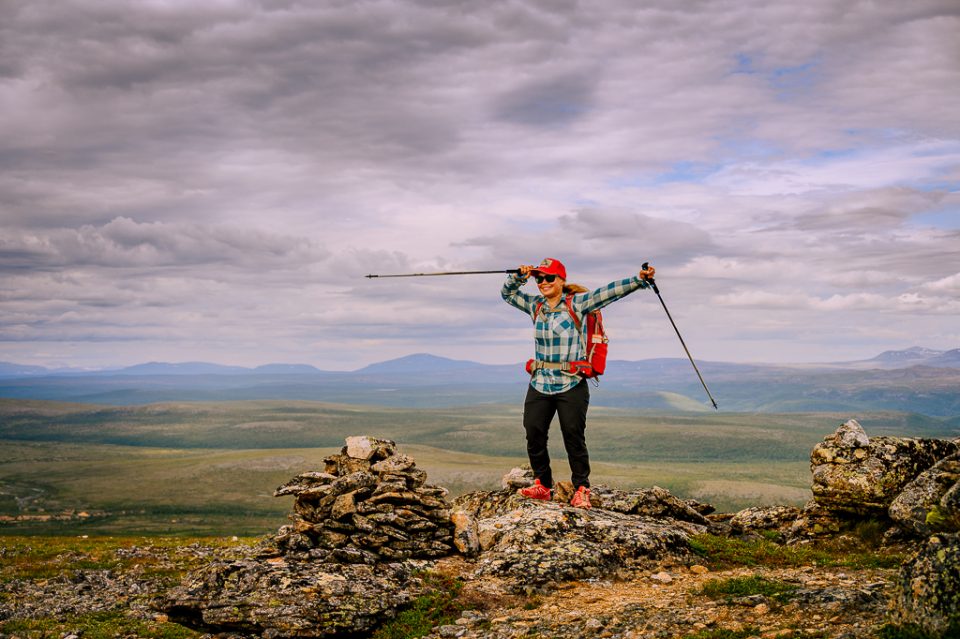
An action shot: a quick celebration on a windy fell top. A wide angle would flatten the fells behind, so I deliberately stood a bit further back to use a longer focal length. 56 mm F5.6 1/2000s ISO 100.
On day trips and treks, the best photos aren't always the technically best ones. Somehow they've just captured the mood and the moment. The focus might be off or some areas blown out, but it still caught the right moment.
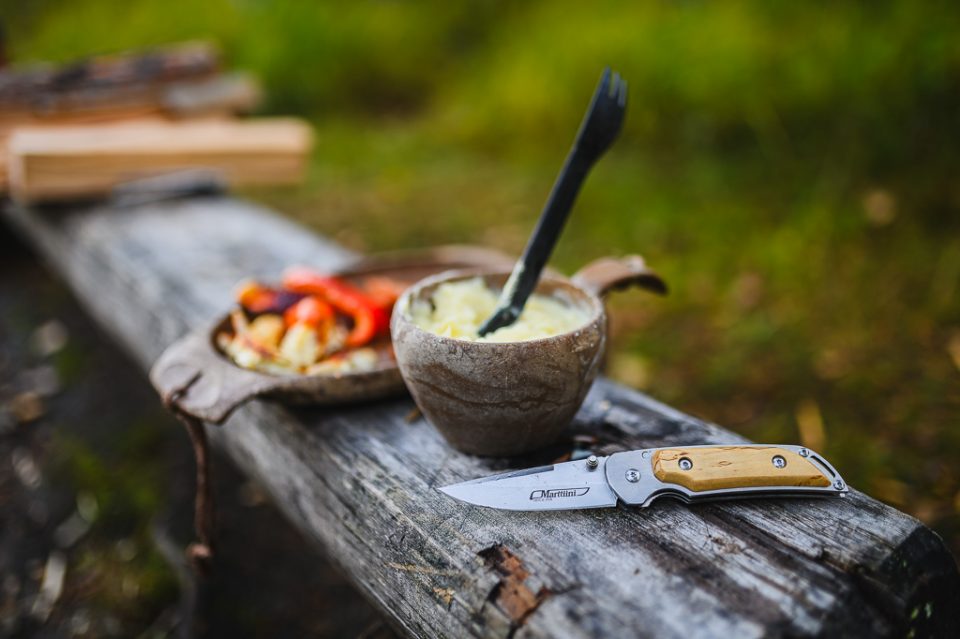
A meal shot from different angles. Here with dwarf shrubs in the background. 35 mm F1.4 1/160s ISO 100.
Still, when you look back at your own photos later, you'll notice the older ones usually just aren't that good. There's plenty to improve, even though they felt amazing at the time. That's a good sign – it means you've progressed.
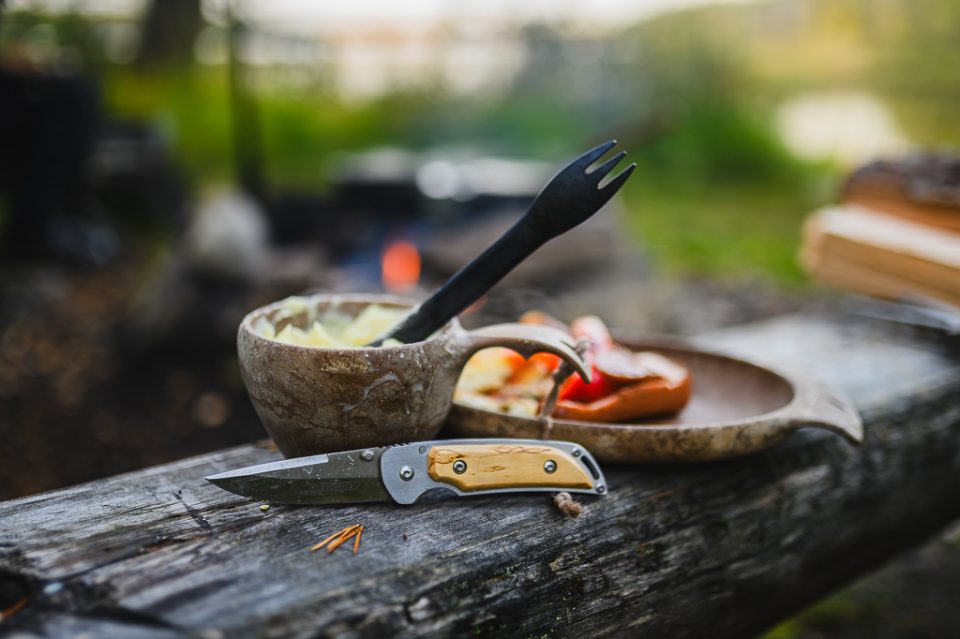
The same subject shot from the other side, with more open space and lake scenery in the background. 35 mm F1.4 1/125s ISO 100.
The only shortcut to good photos is putting in the work: getting to know your camera and kit, studying the theory and boldly trying your own ideas. Learn how light behaves in your images. Light adds sharpness, but it needs to come from the right direction. When photographing a subject, light coming slightly from the side often works best, while backlighting can sometimes create a stunning atmosphere.
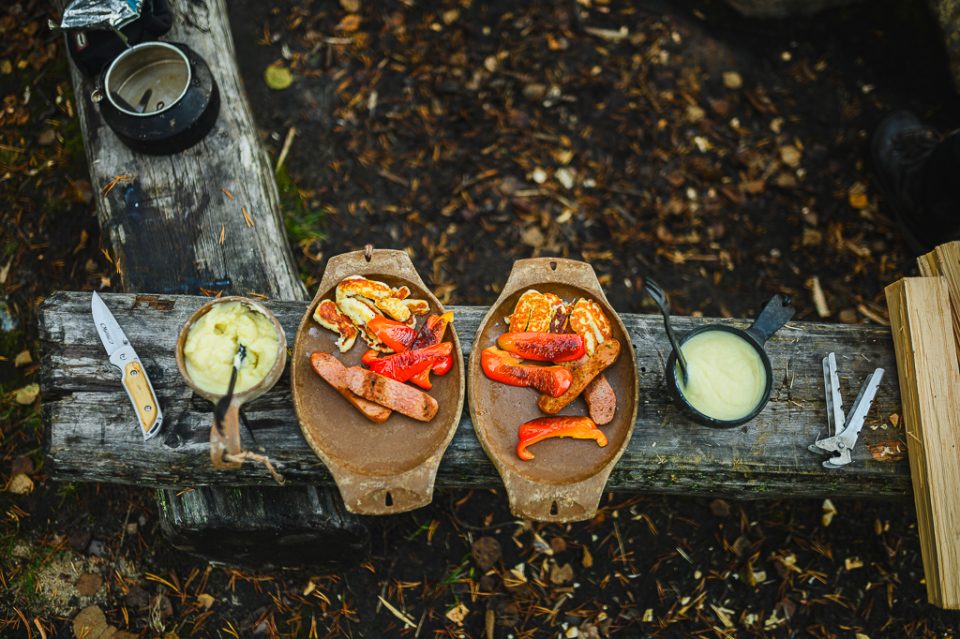
The same scene again, this time shot from directly above. 35 mm F1.4 1/80s ISO 100.
Composition gave me the biggest headaches early on – along with how to frame people so they don't look odd. Learn the rule of thirds and the golden ratio. Once you know the rules, you can start breaking them.
People often ask me how to take more unusual shots
How do you get the softest, most blurred background possible?
A soft background comes from the shallowest possible depth of field. When you focus on a subject, that subject is sharp, while everything in front of and behind the focus point is out of focus. You can adjust the depth of this sharp zone, and the shallower you make it, the more blurred – softer – the background becomes.
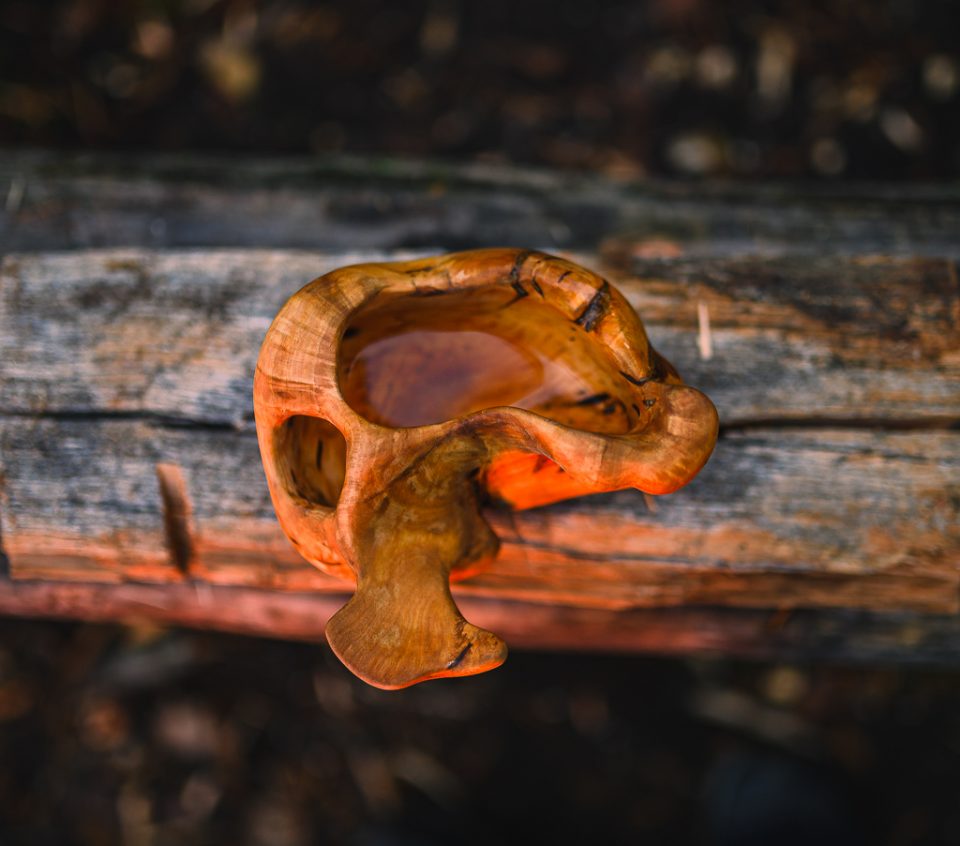
A kuksa cup shot from above, with the background close to the subject. 35 mm F1.4 1/20s ISO 100.
You get a shallower depth of field by opening the aperture as wide as possible (the smallest number), getting as close to the subject as you can, and using a camera with as large a sensor as possible.
A full-frame camera lets you get closer to the subject than a crop sensor does. Phone cameras have a very small sensor, so you usually can't get a soft background except through editing – or the phone takes several shots, or uses several cameras at once, and the software merges them into one image.
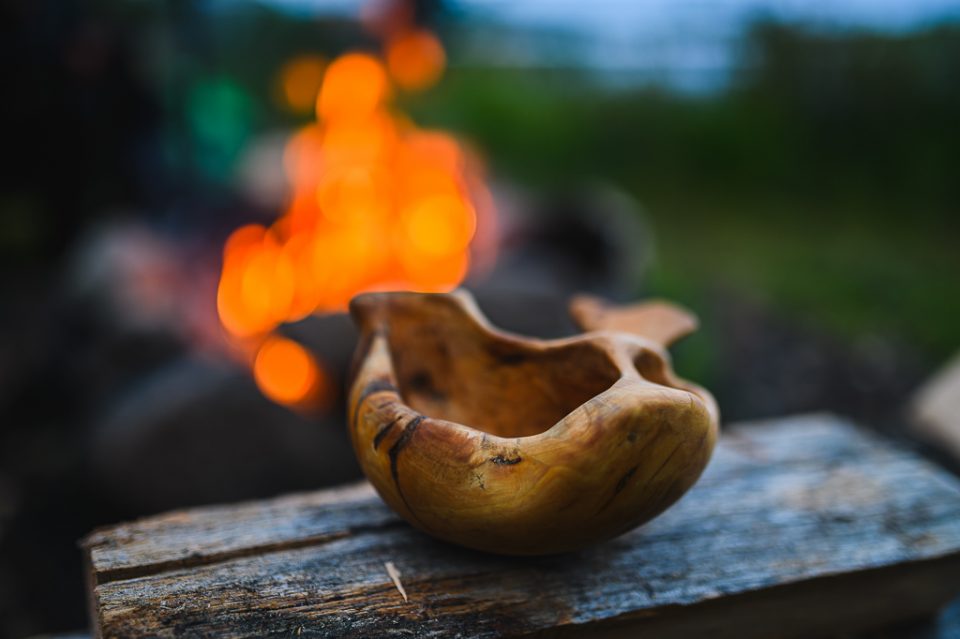
A kuksa shot from the same setting as the previous one, now with more open space behind. The campfire shows up as bokeh balls. 35 mm F1.4 1/100s ISO 100.
If you also choose a spot where there's plenty of open space behind your subject – rather than a tree or wilderness hut right behind it – the background will be blurrier.
How do you photograph a starry sky?
Night-sky shots usually call for a tripod and a fast wide-angle lens. I used to use a 14 mm f/1.4 manual-focus lens; these days I use a 20 mm f/1.8 with autofocus.
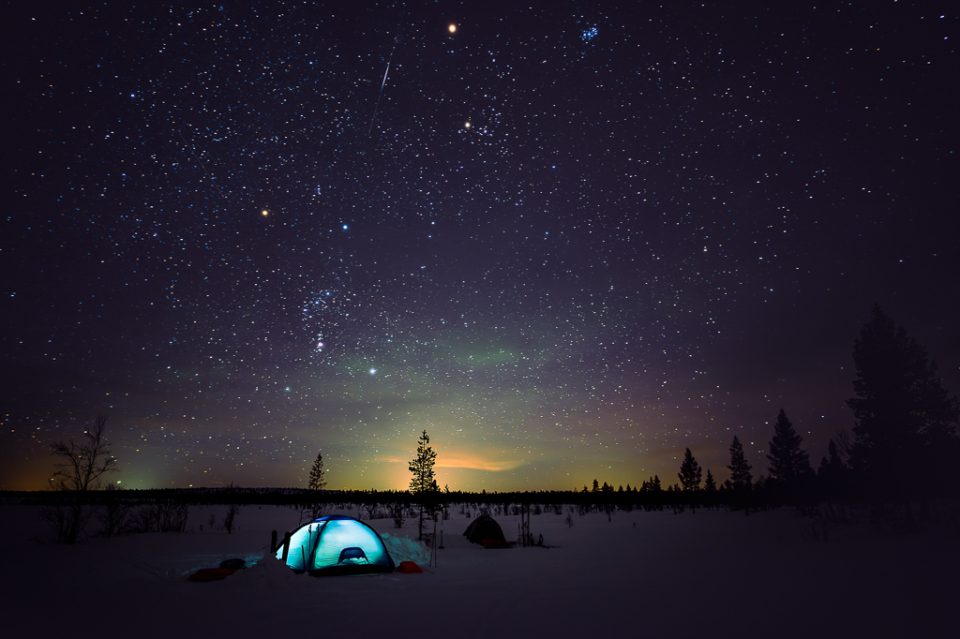
A starry sky on its own often makes a dull photo, but add a subject and the image instantly has more substance. Camera on a tripod, long exposure. 20 mm F1.8 30s ISO 800.
At night it's obviously very dark, and the challenge is getting enough light onto the sensor. You do this with a wide aperture, a long exposure and/or a higher ISO. When it's completely dark, with no moonlight and no light pollution, you often need maximum exposure: the longest exposure possible, the widest aperture (smallest number), and as high an ISO as you've tested your camera can handle without distracting noise.
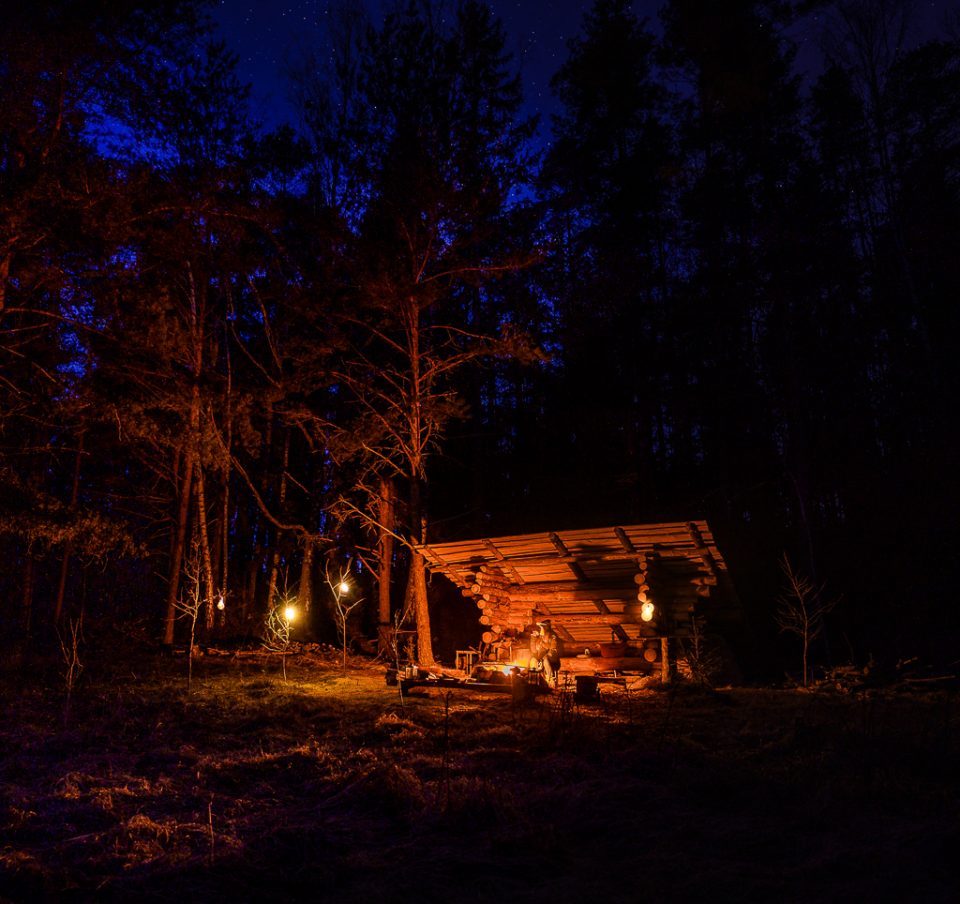
A night shot of a lean-to shelter and a hiker. Here the focus isn't at infinity but on the shelter. You can ask a person to stay still for a while, and get an exposure of almost 10 seconds without too much movement. 20 mm F1.8 8s ISO 400.
With my 20 mm lens I usually use a maximum exposure of 25 seconds, though 20 seconds is better for star shots, because the stars move and lose their round shape. The maximum exposure depends on the focal length and sensor size – you'll find calculators for this online.
You need to focus the lens at infinity, and getting this wrong is the most common reason for a blurry shot. Infinity is rarely exactly where it's marked on the focus ring. Test and practise this in daylight first.
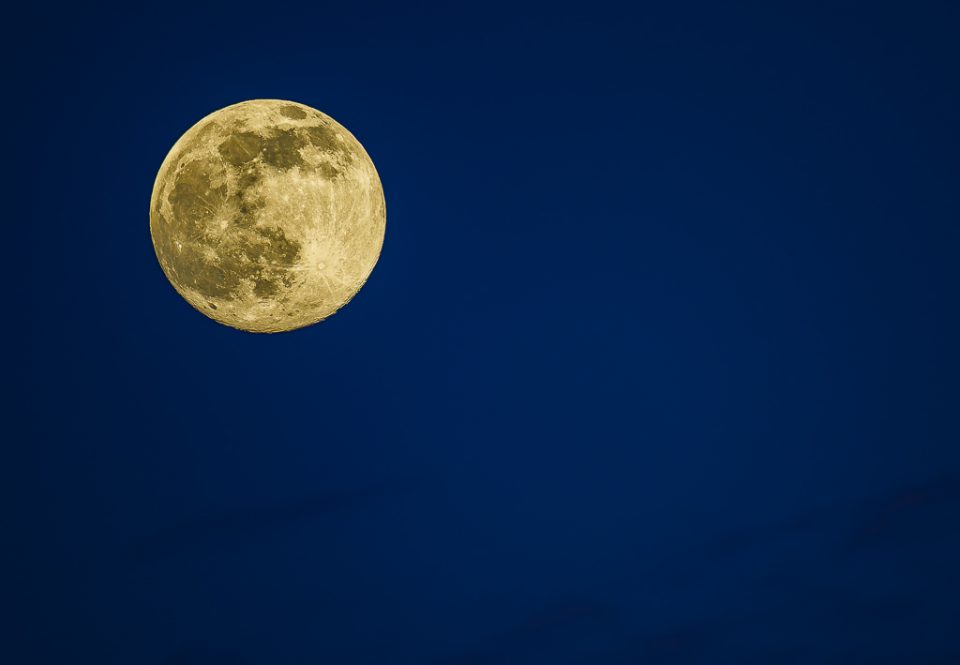
The moon is a moving subject and needs a fast shutter speed, or you'll get motion blur. Shot handheld without any support. 500 mm F5.6 1/100s ISO 100.
How do you get a stunning northern lights shot?
Photographing the northern lights is fairly challenging, especially if you want a stunning shot. First, you need to be outside when they appear. Signing up for an email aurora alert helps a lot.
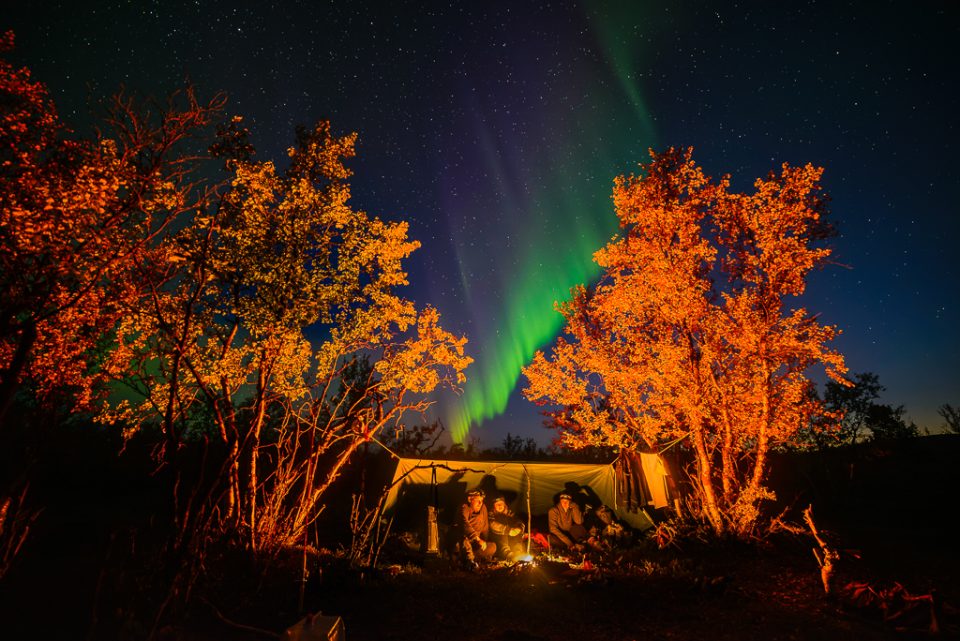
Camera set on a tripod in front of a tarp shelter, with the aurora conveniently behind. A six-second exposure froze the movement nicely. 14 mm F2.8 6s ISO 1000.
You'll need a tripod, and it's worth scouting a good location in advance. A shot of just the aurora on its own is usually dull. In Lapland the northern lights can appear in any direction, but further south they glow in the northern sky. You can even see them at my home in Parainen.
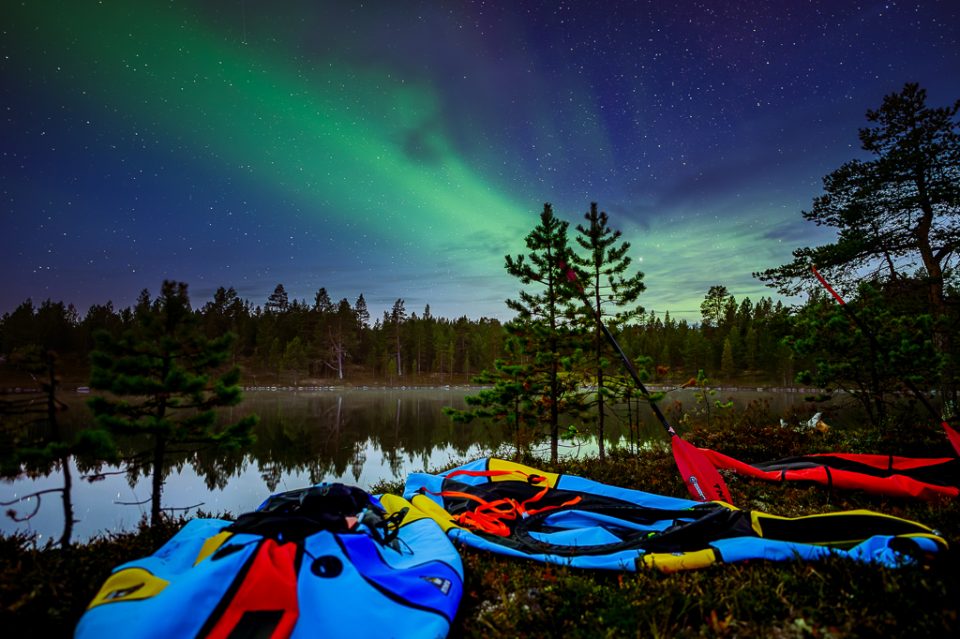
On a night-time loo trip I spotted a green veil on the horizon. Luckily the camera was close by. I needed a long exposure to capture this early-September aurora on the sensor. 20 mm F1.8 20s ISO 800.
The aurora is a moving subject, so too long an exposure wipes out the movement and leaves you with a more or less green smudge. I often use around 3–6 seconds if the lights are moving strongly and bright enough.
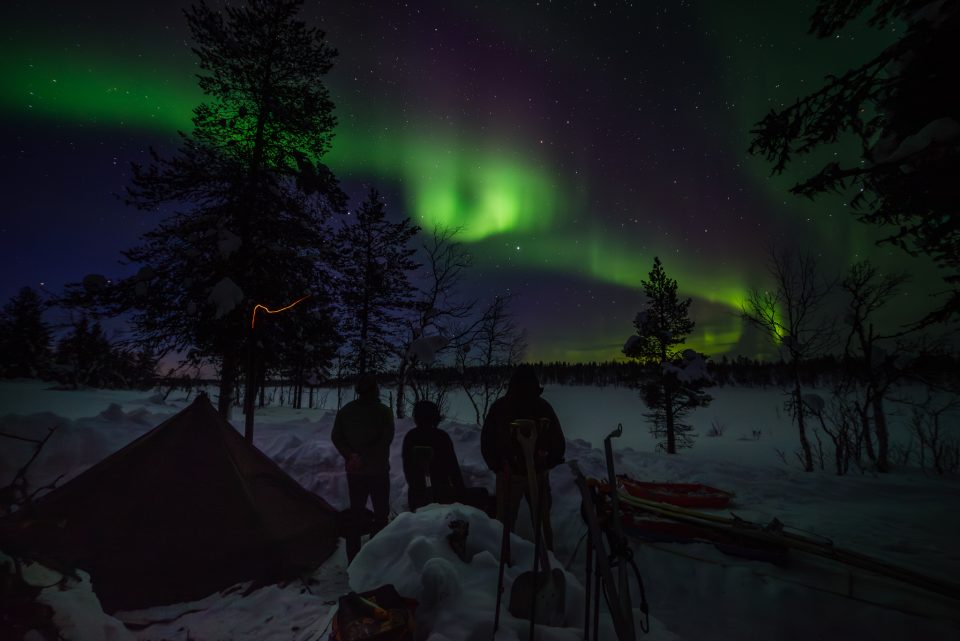
The camp crew admiring the northern lights at night. A slightly faster shutter speed would have frozen the movement better. The brightest part is almost blown out. 14 mm F2.8 6s ISO 400.
You often see aurora photos where the lights are blown out. They may have been overexposed when shooting or during editing. You can recognise a blown-out aurora because it loses its colour and turns almost white.
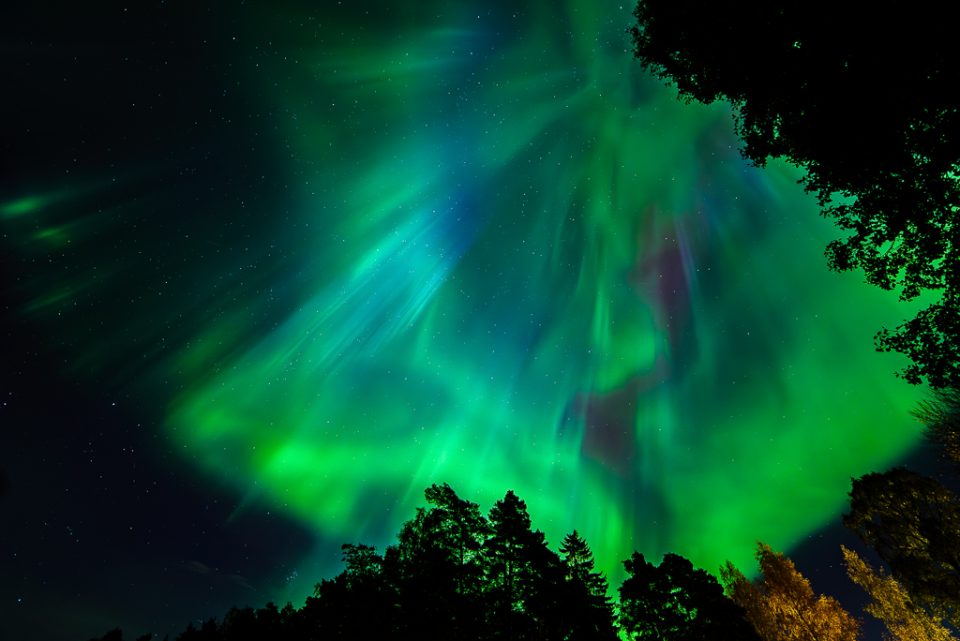
A rare sight: an auroral corona. The aurora directly overhead in Turku. 14 mm F2.8 4s ISO 400.
The keys to a successful aurora shot are a good location, a grasp of the basics, practice – and simply spending a lot of time outside. The best moment might last only minutes, and if you're indoors at the time, you'll be too late by the time you get out. Sometimes I leave the camera set up outside on the tripod with roughly the right settings, put a spare battery in my pocket, warm up in the tent and pop out every so often to check the sky.
Photography on treks
Shooting on a trek is the ultimate challenge. When you're carrying a heavy backpack, paddling a packraft through rapids, hauling a pulk through deep snow, or it's wet and windy, it's easy to skip taking photos. What helps is real enthusiasm for shooting and a genuine love of the hobby.
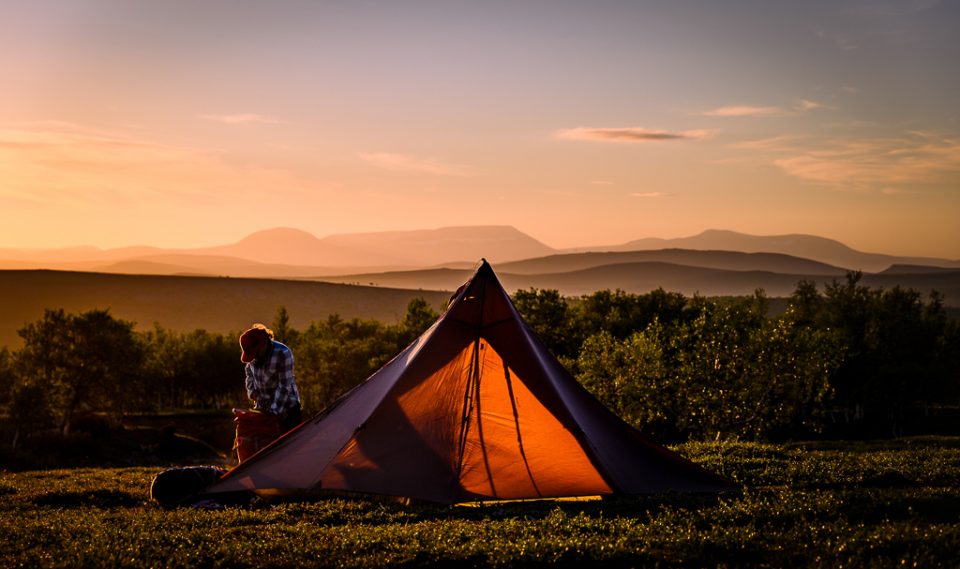
Pitching the tent in the midnight sun. The image has been toned slightly towards violet. 94 mm F6.3 1/1000s ISO 100.
Flicking through your photos lets you go back to a trek again and again. You start to forget things that happened along the way, but if you've documented them in photos and videos, you can always return to those treasured moments.
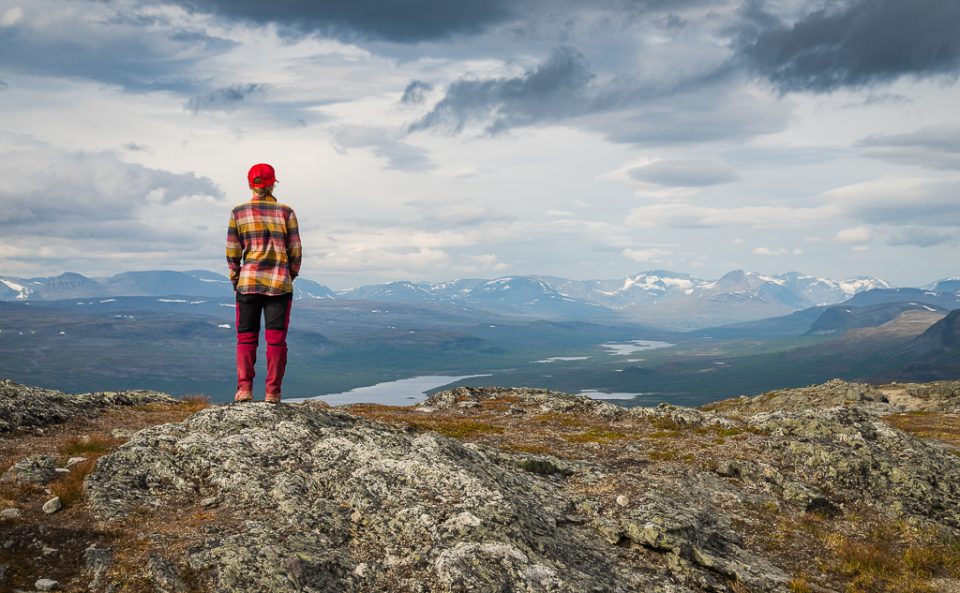
Taking in the big fells. 52 mm F8 1/500s ISO 100.
I've lugged some serious camera kit across the wilderness, and I've learned that what matters is having a camera you'll actually use. In other words, keep it within reach – not tucked away safely at the bottom of your pack.
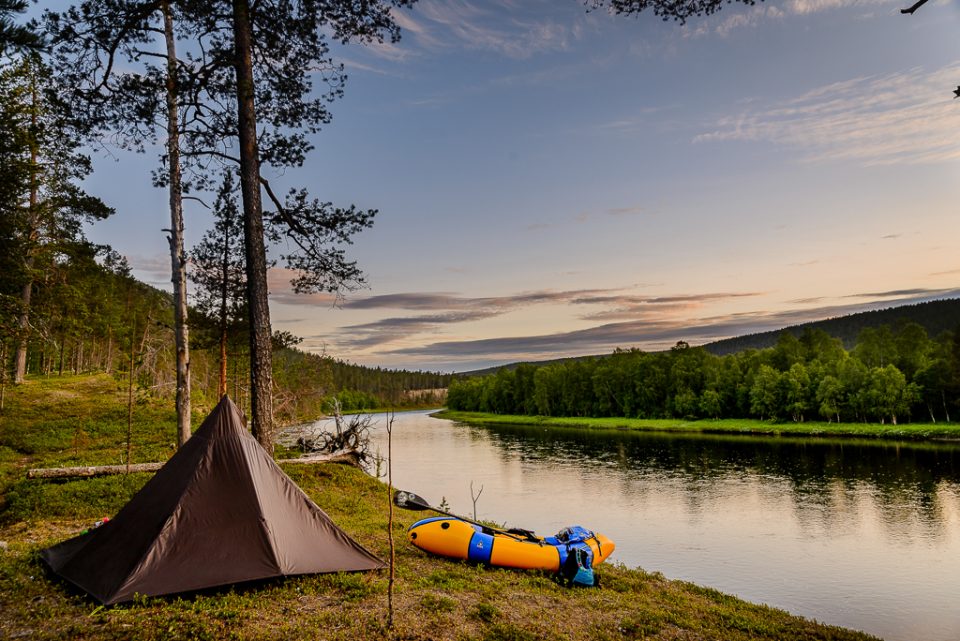
In a shot like this, either crop out the stray branches in the top right corner or remove them with editing tools. 24 mm F7.1 1/50s ISO 100.
The straps that come with cameras have always stayed in the cupboard for me – I use better ones. I've used three different types:
Sling strap
You can carry the camera for long stretches and get to it quickly. The strap doesn't weigh heavily on your shoulders even on a long leg. However, it easily gets tangled with your pack straps, and taking your pack off when everything's knotted together is really annoying. The camera also takes knocks easily if it's hanging at a handy shooting height.
Shoulder strap mount on a backpack or trekking pack
The camera is always close at hand. You can grab it quickly and it's fairly easy to put back. It's well positioned, so it doesn't take knocks easily. A heavier camera setup does start to drag after just a few hours, though. It helps a little to clip a bottle with half a litre or so of water to the other shoulder strap as a counterweight.
Wrist strap
If your camera isn't too heavy and you're shooting a lot, you can simply carry it in your hand. I use this sometimes when I know part of the trek is especially photogenic and I'll be taking lots of shots. It doesn't work with trekking poles, so I only use it for short stretches.
No strap
Quite often I carry the camera with no strap at all. In that case, I have a spot where I can slip it away. Without a strap, it fits better into a pack, a waterproof bike pannier or a deck bag for paddling.
Protect your camera kit
Camera gear doesn't like moving too quickly from cold to warm, or from damp to dry. In winter, if the tent is heated, I leave the camera sheltered in the porch. When I get home from a trek, the camera stays in its bag in the car for a good while, and at home it waits a bit longer before I take it out. If you bring a camera straight from the cold into the warm, condensation forms inside it.
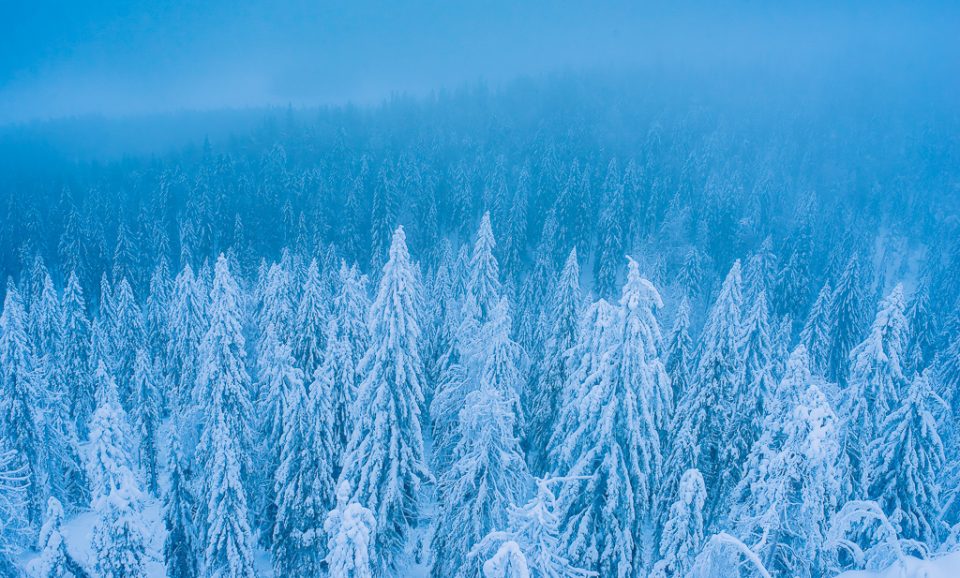
Climbing above the treeline changes the perspective completely. 35 mm F10 1/60s ISO 400.
Protect your lenses from knocks inside your pack. I often wrap a lens in a wool sock and pack it among soft clothes or in my sleeping bag. Everything in my pack is always kept dry in waterproof dry bags – camera gear often double-bagged.
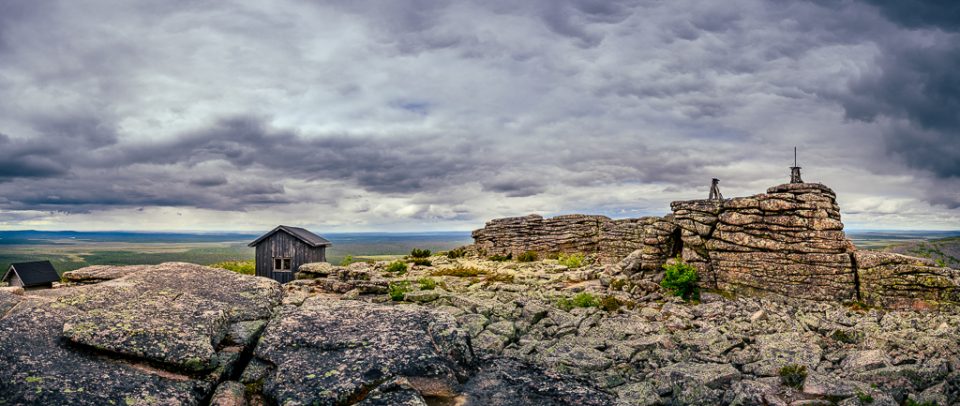
If your lens doesn't go wide enough, you can make a panorama by stitching several shots together. A 7-shot vertical panorama from the summit of Pyhä-Nattanen. These make great prints too – this one is over 10,000 pixels wide. 24 mm F4 1/1600s ISO 100.
In cold weather, camera batteries tend to give up, so I often keep a spare in the front pocket of my trousers where it stays warm from my thigh. Sometimes the battery in the camera claims to be empty once it's cold, and I swap them back and forth between pocket and camera.
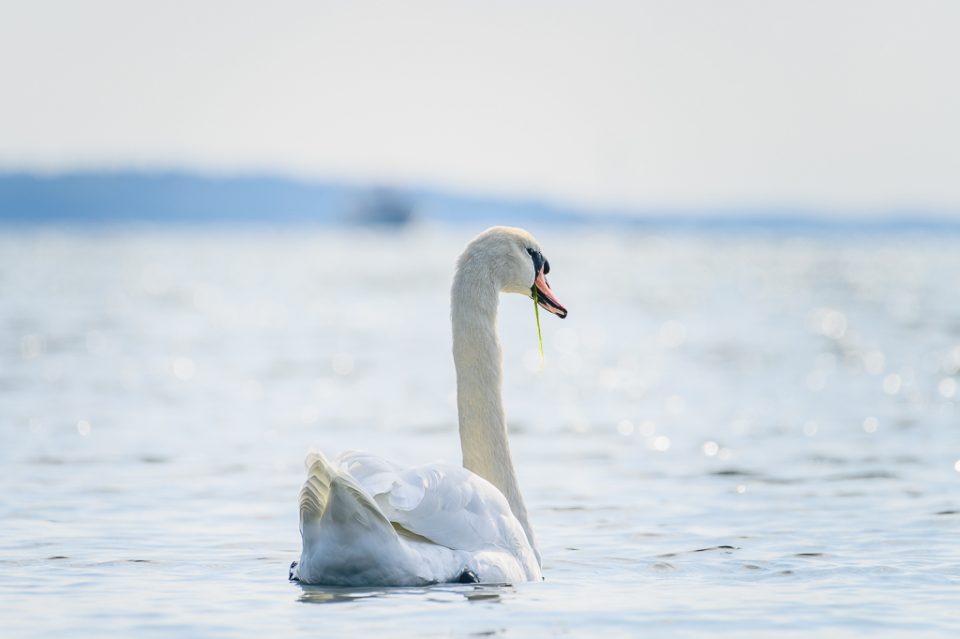
A mute swan on the seashore. 500 mm F8 1/1250s ISO 100.
On a trek, the front element of your lens can easily take a hit if you're not careful. You can protect it with a lens hood and/or a protective filter screwed into the filter thread. I've broken several lens hoods – they're good at absorbing impacts, often still usable even when cracked, and cheap to replace.
If your camera isn't weather-sealed, just pack it away safely in your pack when it starts to rain.
Editing – RAW or JPG?
When Facebook and phone cameras took off, photography changed. In wealthy Western countries, practically everyone has a camera and is a photographer in their own way. Editing, though, is less common and stirs up strong opinions. Some people think photos shouldn't be edited because then they're no longer authentic, and the only authentic photo is an unedited phone shot. What they forget is that a phone photo is actually an edited JPG. The phone's software includes an image processor that edits every single shot – sometimes quite heavily.
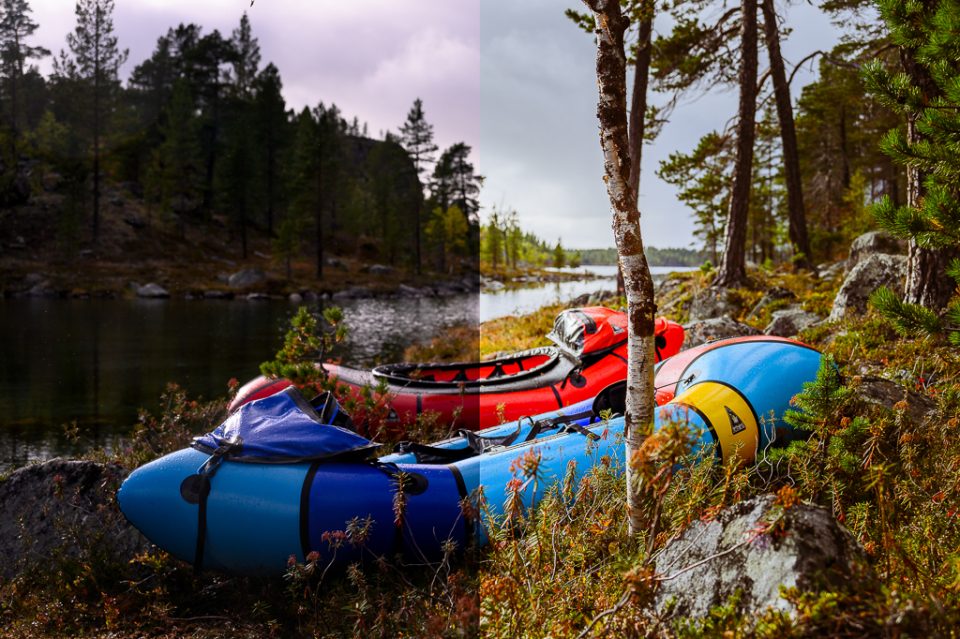
Unedited RAW image on the left, edited image on the right. In editing, you can lift the exposure in the shadows without blowing out the sky.
In the end, what really matters is how much you edit, and what the photo is for. Was the aim to document the moment as closely as possible to how the photographer saw it? Or was it to be creative – to make the image as beautiful as you can, or to capture feelings rather than “reality”?
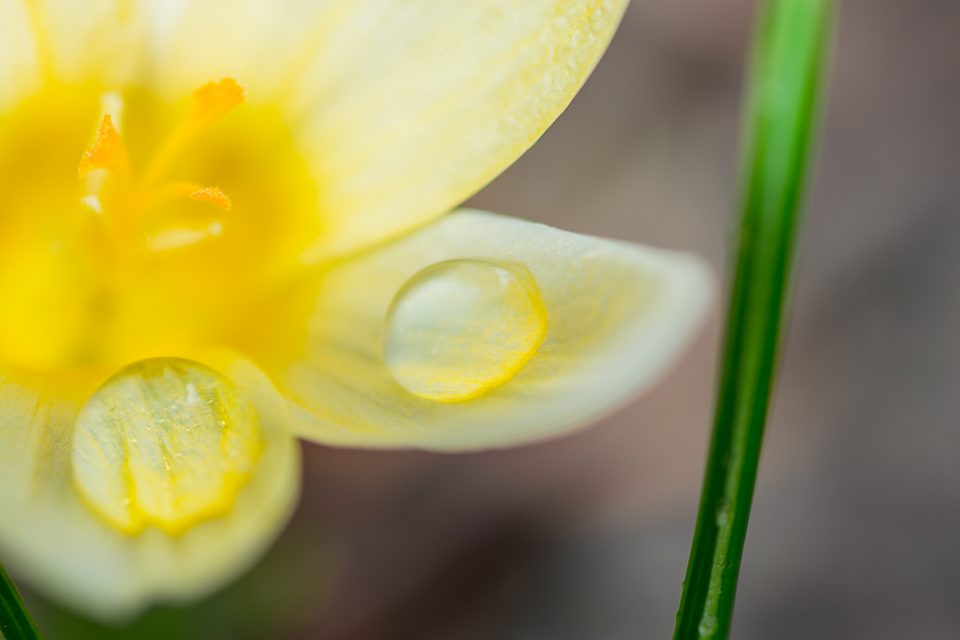
A photo can sometimes be a more creative, artistic interpretation – it doesn't always have to imitate “reality”.
The human eye and brain work very differently from a camera, so what you see and what the camera records aren't the same. Next time you're shooting, take a proper moment to look at the scene, then compare it with the photo. They look very different. It's hard to match the exposure to how it was in nature – shadows and highlights in particular suffer, and you have to find a compromise between them, because a camera's dynamic range usually can't capture everything.
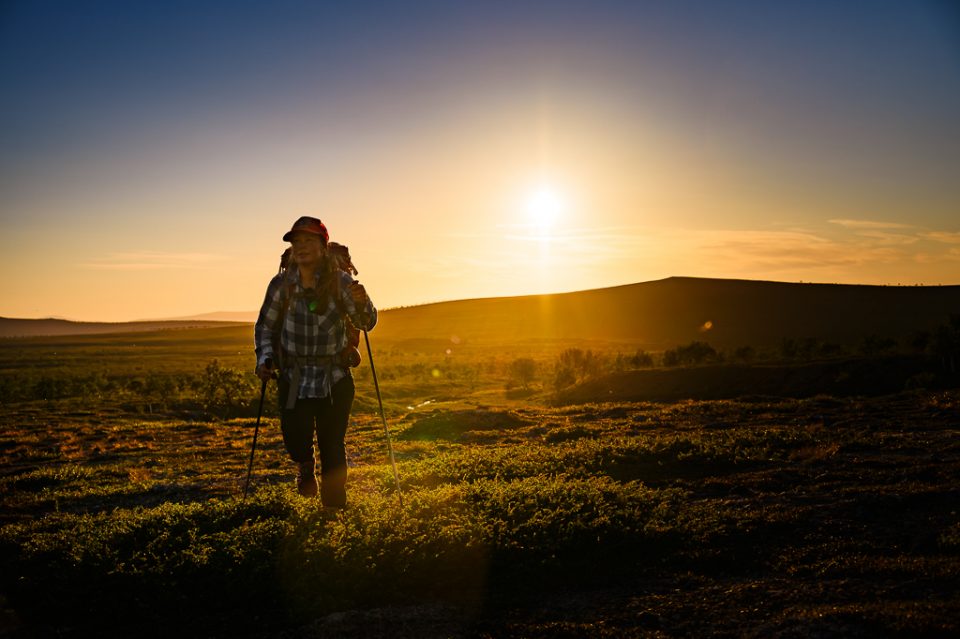
A hiker against the light. We were trekking in the midnight sun. Because of light sensitivity, I have to wear sunglasses, and I often see things differently through them. In post-processing, I adjusted the colours to match how it felt to me. 50 mm F5.6 1/4000s ISO 100.
On a day trip or trek, I often settle on a style when editing – a mood I picked up from the colours around me – and then apply it to the photos. In professional work, though, you can't always go with your own taste. You either follow the client's style or come up with one that suits how the image will be used.
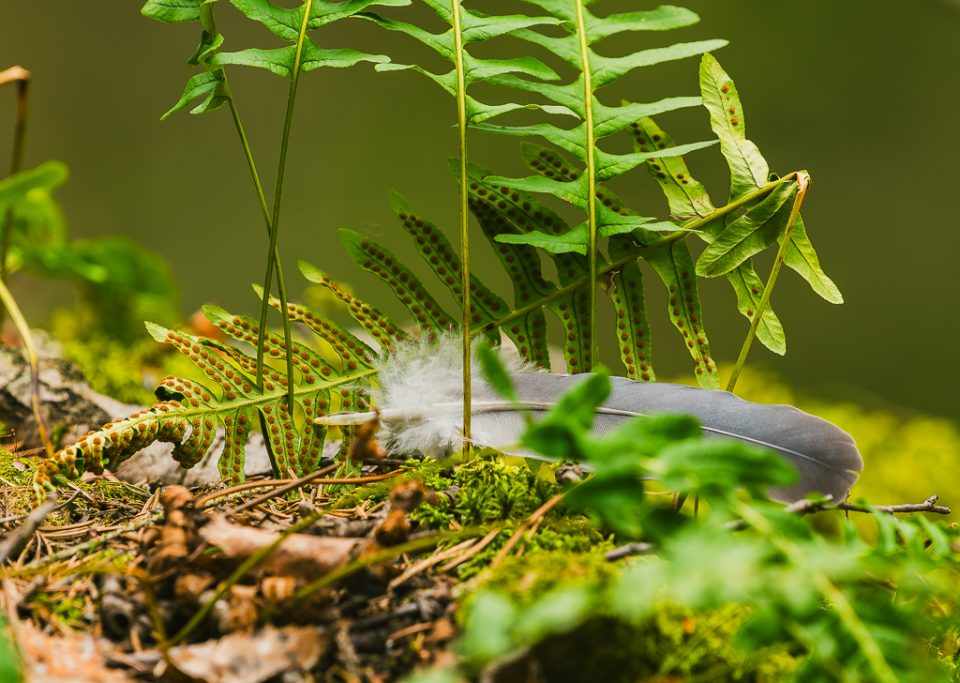
A close-up with a long telephoto lens gives a soft background. 500 mm F5.6 1/160s ISO 400.
If you plan to do a lot of editing afterwards, shoot RAW, as the files hold more data. If you won't edit at all, or only make small tweaks, shooting JPG can make perfect sense. But if you later get into editing and all your old photos are JPGs, you might regret it.
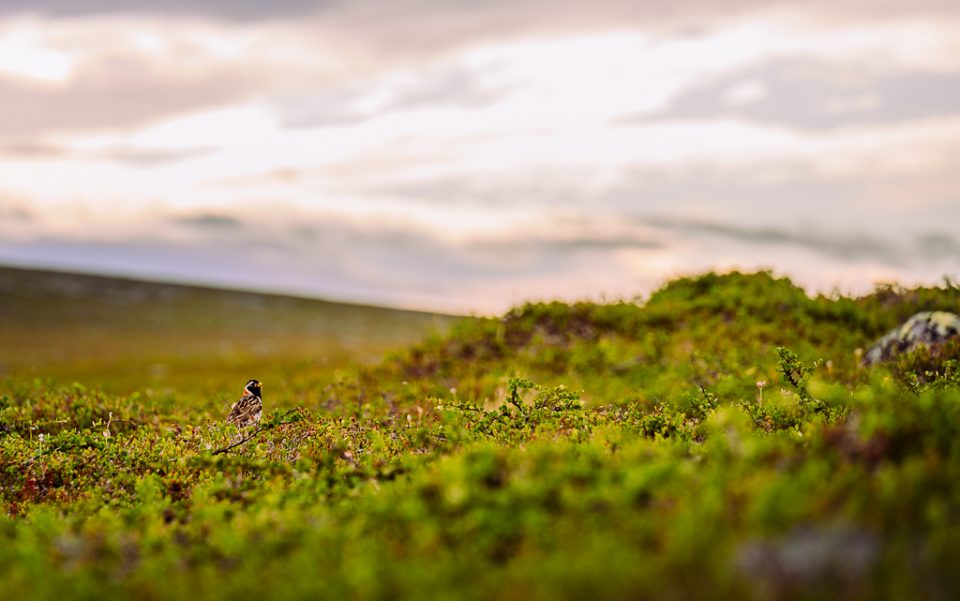
A Lapland bunting blending into the terrain, shot from ground level. 200 mm F6.3 1/160s ISO 100.
I really enjoy editing – going through and working on the photos is one of the best parts of getting back from a trek. That's why I shoot RAW and use Lightroom. Adobe's photography plan costs under €15 a month, and in my opinion it gives you far more value for money than buying more expensive camera gear.
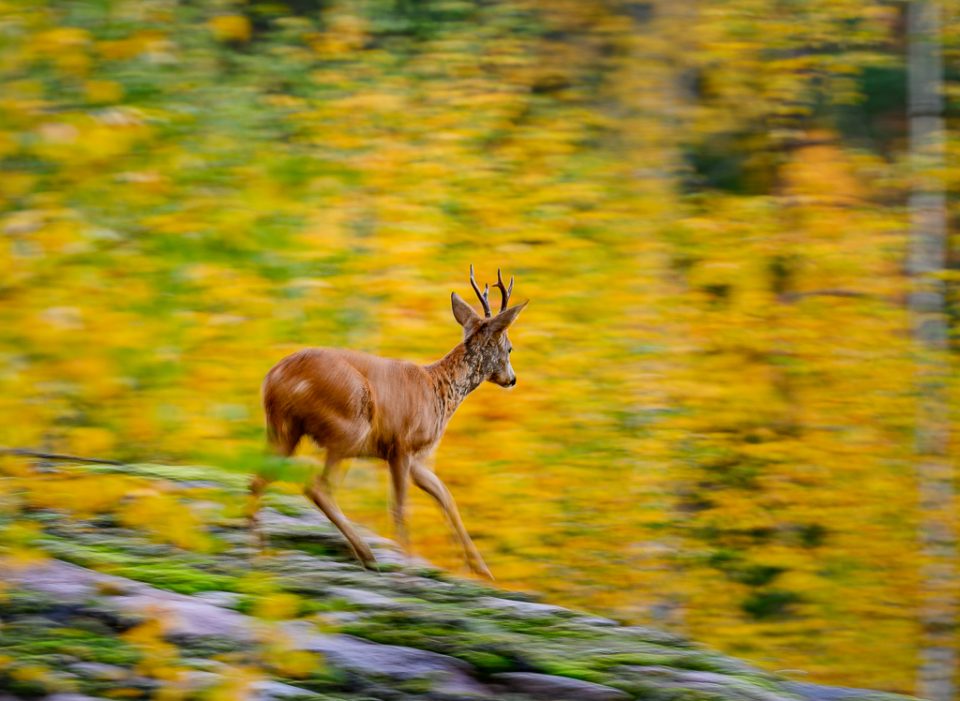
A roe buck took me by surprise while my camera had the wrong settings. I panned – turned the camera to follow it as it ran while shooting – and the head came out sharp, although the rest of the animal and the background are blurred. Motion blur can't be fixed afterwards.
Lightroom is very easy to use, and there are loads of tutorial videos on YouTube. You can save your own presets and apply them to photos quickly, which makes posting to social media fast. In practice, you only keep the RAW files on your hard drive and export JPGs whenever you need them. You can change your edits later at any time. Remember to back up your RAW files.
Responsible photography outdoors
When you're shooting in nature, always keep responsibility in mind. Even if you're after a great shot, respect access restrictions and leave wildlife in peace. Birds in particular don't like being disturbed, so photograph them from a distance with a longer focal length.
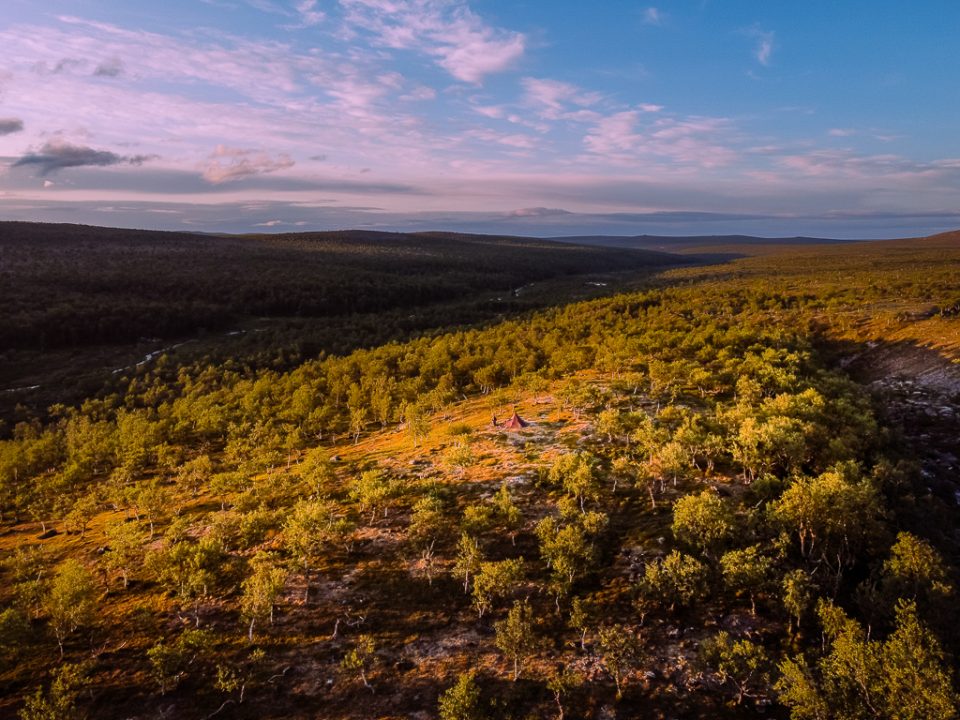
A drone shot in the wilderness gives a good overview of the campsite.
Be considerate of other people too. Drones in particular are loud, and not everyone wants to listen to one while enjoying the peace of nature.
In Finnish nature reserves, flying drones is prohibited in restricted-access areas, at important bird nesting sites (for example islands, skerries and sea bays where bird colonies breed) and at important resting sites.
I hope this long read has given you some tips and inspiration for your photography. Enjoy every moment of a brilliant hobby!